SynthCity
SynthCity is a passion project that I started in late 2022. Ever since I first started programming I’ve been fascinated by the possibilities of procedural generation where instead of hand-placing 3d assets in an environment, you create an algorithm that uses various techniques such as Perlin noise to strategically place them for you. Inspired by Bladerunner and synthwave aesthetic, I used these techniques to create an infinite procedural cyberpunk city that runs in a web browser, powered by Three.js.
At the urging of a few friends, I decided to release SynthCity to the public as an interactive audiovisual experience. Sit back and relax while autopilot takes you for a ride, take the wheel and fly, or explore the endless world in “freeroam” mode – all while enjoying a curated synthwave playlist.
Behind the Scenes
Generator.js
At the core of SynthCity is a class I call a “Generator”. With a few simple parameters it can manage the spawning and despawning of items within the player’s vicinity:
- Position – Usually the active camera’s position
- Cell size – The size of a grid cell
- Cell count – The number of cells (in the X and Y axis)
- Spawn object – A class that the generator instantiates with each cell
For this project the Generator class only needed to manage a 2-dimensional grid, but it could easily work in three dimensions too.
Spawned Objects
The objects spawned by the generator are expected to accept a position (X and Y in this case) in their constructor, and to have a remove() method as well as an optional update() method.
When the generator spawns an object, it passes the world position of the cell into the constructor. When it despawns an object it calls its remove() method, and if an update() method exists it simply calls that in the render loop.
The constructor params and update/remove methods can then be “propagated” down to lists of objects managed by each cell. This is how I created detailed city blocks, each with their own local building grids and various animated effects.
Choosing the Generators
With the generator class out of the way, it was time to start spawning objects. An important thing to understand is that the objects spawned by a generator are abstract – they don’t have to represent a single building, or even a physical object located at that position in the world. You could go as far as generating NPCs and their entire daily routines using this method.
For this project though, I stuck with the more intuitive approach where the objects do represent something located at that position in the world (or in the vicinity) such as buildings. Here are the three types of generators I chose for SynthCity:
- City blocks
- City lights
- Traffic
City Blocks
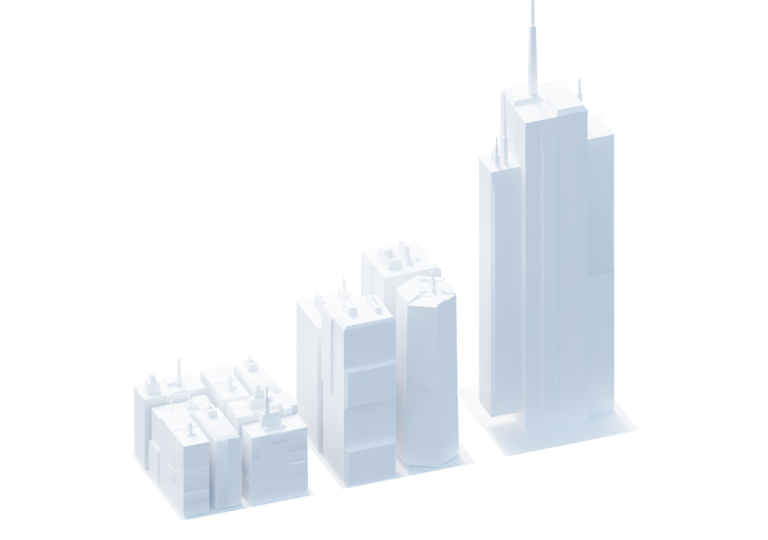
For the city blocks I started by referencing satellite imagery of my local downtown area and decided on a block size of 128×128 meters and a road with of 24 meters. A city block could contain a group of smaller residential and office buildings, or a single skyscraper.
City Lights
At some point I realized that placing far-reaching point lights in certain areas made the city look about 1000x better. You often see densely populated areas in real cities emitting light that illuminates the bases of the towers and the general area. I didn’t need city lights to spawn in every block, so I created a separate generator with a much larger cell size that would place lights only every few blocks at a minimum.

However, point lights come with a pretty significant performance cost, and I was sad to see that instantiating them with a generator caused significant framerate hitches. Fortunately, there was a simple solution: instantiate the maximum number of point lights in the beginning and put them in an array, where each light has a boolean variable named “available”.
let cityLights = [
  {
    light: new PointLight( 0x000000, 100, 1500, 1 ),
    available: true
  },
  {
    light: new PointLight( 0x000000, 100, 1500, 1 ),
    available: true
  },
  {
    light: new PointLight( 0x000000, 100, 1500, 1 ),
    available: true
  }
];
All lights are initially turned off and marked available. When the generator decides to place a light, it simply grabs the first available light, places it at that position and marks it unavailable. When the cell despawns, it turns off that light and marks it available for use in other parts of the city.
Traffic
What is a cyberpunk city without flying cars? This generator spawns a random number of cars at the cell’s position, each of which choose a random direction (north, south, east, west) and corresponding altitude. They can also randomly increase their altitude by a few hundred meters to give the illusion of different flight levels with different speed limits.

When a car reaches a certain distance from the player, it reverses direction (usually far enough away that you don’t notice). When the cell despawns, the car is removed – which is why you will inevitably see cars vanish from existence if you follow them long enough.
Perlin Noise
At this point you could start placing buildings randomly within each city block, but that has two major downsides:
- Buildings aren’t uniformly distributed in real cites. In a real city you would expect to see clusters of similar buildings (e.g. residential areas with small buildings, industrial areas with office buildings and downtown areas with skyscrapers).
- The world should be persistent. If you just use
Math.random()to choose a building then it would be different every time that cell spawned. I wanted the world to have the illusion of being persistent, so that each area would remain exactly the same no matter how far the player traveled away from it.
Perlin noise is perfect for this use-case because:
- It combines noise at different scales (or octaves) to create large areas with similar values and smooth transitions between
- You can easily provide a seed value, ensuring that the resulting noise value will always be the same for a given input.
- It’s commonly implemented to take a multi-dimensional input, so you can intuitively pass in a 2d or 3d position in space and get a corresponding value.
I used Processing’s implementation for this project.
Making Sense of the Noise
The noise function returns a value between 0 and 1, but what do you do with that? The simplest example is classifying city blocks:
function getCityBlockType(x,y) {
  let n = noise(x,y);
  if ( n < 0.33 )
    return "residential";
  else if ( n < 0.66 )
    return "industrial";
  else
    return "downtown";
}
This would have the following effect:

You can then take this concept and apply it to anything; what types of buildings are placed within each city block, how they’re scaled and rotated, what textures they get, what sorts of advertisements they have, the density of advertisements in that area and so on… with each attribute using different noise layers or X, Y offsets to add variation.
Building a City
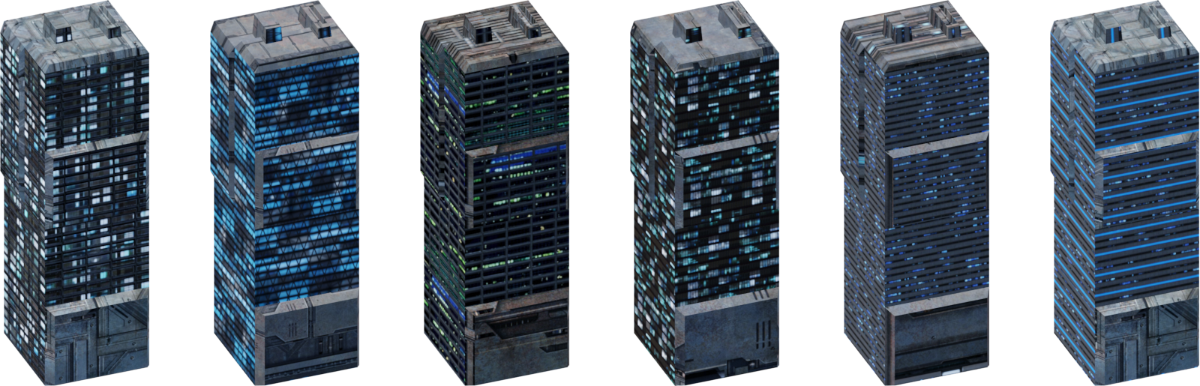
At this point I had all the tools I needed to create a cityscape, so now it was time to create the 3d assets. To give the world as much variety as possible without creating a ton of unique assets, reusability was key. Almost every mesh in SynthCity is UV mapped in a way that allows its textures to be swapped interchangeably. For example, every building can use one of 10 different building textures. The same is true for advertisements and other effects such as spotlights and smoke plumes.
I applied the same strategy to geometry too; each classification of building has a few different advertisement layouts that can be independently rotated and textured. Using this approach, I was able to create thousands of unique combinations at runtime from just a couple dozen models and textures.
Postprocessing
Despite experimenting with several different postprocessing effects such as film grain, chromatic aberration, lens distortion and more… I ended up only using an UnrealBloomPass in the final project. This not only makes all of the emissive materials like advertisements glow, but setting the bloom threshold to zero also gives the whole scene a kind of pseudo-volumetric lighting effect.
Sound Design
For the various ambient sounds and sound effects, I scoured Freesound.org and mixed together sounds from dozens of contributors. Many of these sounds are simply looped and their volume modulated based on speed, altitude, g-force etc.
Making it Interactive
Flying around this infinite procedural world was cool, but I wanted to make it a more entertaining and interactive experience for all the non-programmers out there. While I had about a hundred different game ideas that could take place in this world, I opted for a more “ambient” experience where users could enjoy the visuals with nothing more than a computer mouse, or even use it as a sort of screensaver. To finish up the project, I added:
- A cool cyberpunk terminal loading screen
- A fully controllable flying car in addition to the “freeroam” mode
- Collision detection powered by three-mesh-bvh
- Some basic graphics settings
- A radio that shuffles a playlist of synthwave music from Uppbeat.io

Source Code
All of the source code and assets for SynthCity:
I hope you enjoy it as much as I enjoyed making it! If you have any questions, please feel free to contact me.
Credits
- Three.js – mrdoob and countless contributors
- Bladerunner car – quaz30 on Sketchfab
- Sound effects – Various contributors on freesound.org
- 3d assets – Various contributors on CGTrader and Sketchfab
- Music – Uppbeat.io
- https://uppbeat.io/browse/artist/prigida
- https://uppbeat.io/browse/artist/pecan-pie
- https://uppbeat.io/browse/artist/mountaineer
- https://uppbeat.io/browse/artist/d0d
- https://uppbeat.io/browse/artist/fass
- https://uppbeat.io/browse/artist/tatami
- https://uppbeat.io/browse/artist/kaleidoscope
- https://uppbeat.io/browse/artist/noise-cake
- https://uppbeat.io/browse/artist/mood-maze
- https://uppbeat.io/browse/artist/bosnow
- https://uppbeat.io/browse/artist/tecnosine